Create Jaw-Dropping Wall Art Made of Wood: The Ultimate Beginner’s Guide
Table of Contents
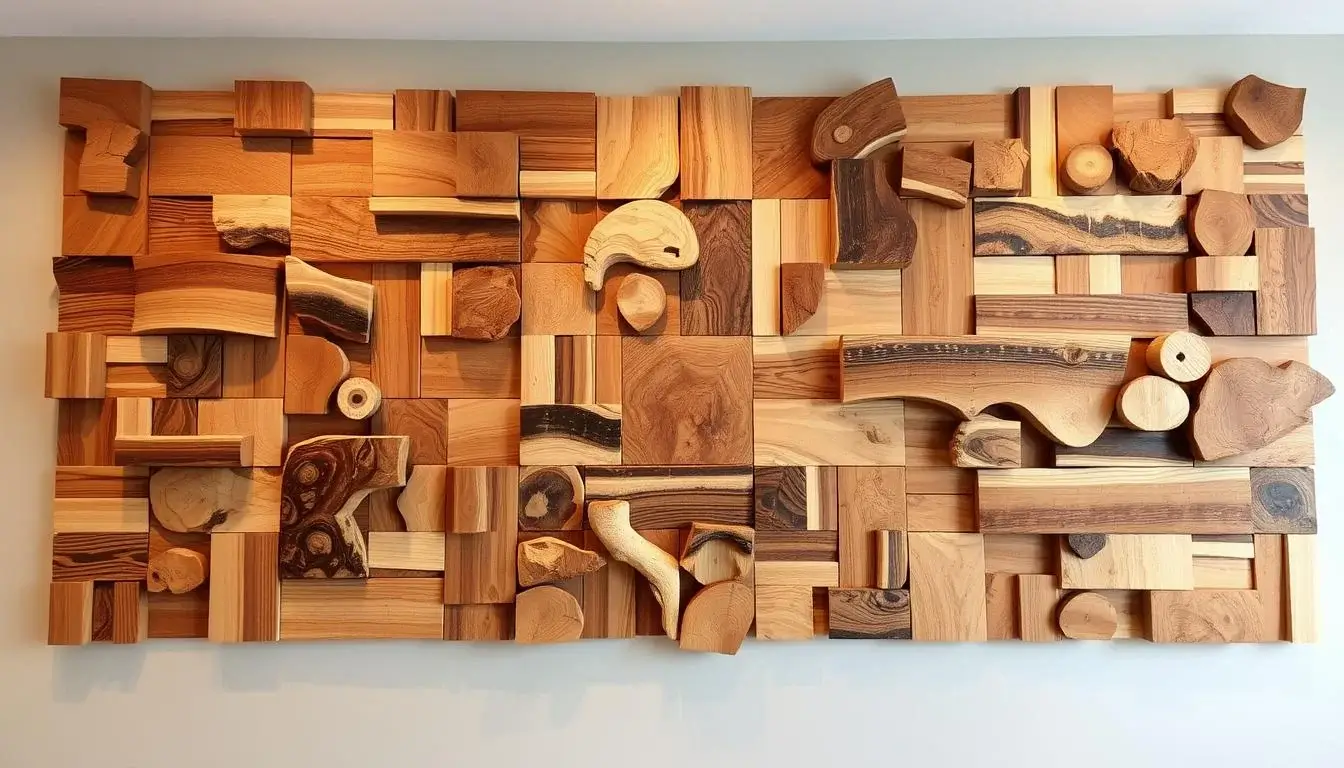
Thinking about making your home look better? Wall art made of wood is a great choice. It’s a creative way to change your walls with unique wooden decor. This guide will show you how to make custom pieces that show off your style, from start to finish.
Making wooden wall decor is fun and rewarding. It lets you add a personal touch to your home. With this guide, you’ll learn how to make beautiful wooden wall art that fits your home’s look.
Looking to make a bold statement or a quiet accent? This guide will help you through the steps of making wall art from wood. You’ll learn about the tools and materials you need, design tips, and techniques for amazing wooden decor.
Key Takeaways
- You will learn how to create custom wall art made of wood that reflects your personal style.
- This guide will cover the essential tools and materials needed for crafting wooden wall decor.
- You will discover various design considerations and techniques for creating beautiful wall art made of wood.
- By following this guide, you will be able to transform your walls with handcrafted wooden wall decor.
- This guide is perfect for beginners looking to explore the world of wall art made of wood.
- You will gain the knowledge and skills needed to craft stunning wooden wall decor that complements your home’s aesthetic.
Essential Tools and Materials for Wall art made of wood
To make stunning wooden wall decor, you need the right tools and materials. For large wood wall art, the quality of your tools is key. Start with basic woodworking tools like saws, drills, and sanders. These help you cut, shape, and smooth the wood for your design.
The type of wood you pick is also important. Hardwoods like oak or maple are durable and last long. Softwoods like pine or fir need more care. Think about the color, texture, and grain you want for your large wood wall art.
Basic Wood Working Tools
- Saws (circular, jigsaw, or handheld)
- Drills (cordless or corded)
- Sanders (belt or orbital)
Types of Wood to Consider
- Hardwoods (oak, maple, cherry)
- Softwoods (pine, fir, spruce)
Additional Supplies and Safety Equipment
Remember to get safety gear like gloves, safety glasses, and a dust mask. You’ll also need wood glue, nails, and a tape measure. With the right tools and materials, you can create beautiful wooden wall decor and large wood wall art pieces.
Understanding Different Wood Types for Wall Art Projects
Creating wall art made of wood requires knowing the different wood types. Each wood has its own look, benefits, and drawbacks. You can pick from hardwoods and softwoods, thinking about grain, color, and how long it lasts.
To make stunning decorative wood wall art, consider these wood types:
- Oak: known for its strength and distinctive grain pattern
- Pine: a softwood that is often less expensive and can be stained to match various decor styles
- Maple: a hardwood with a light color and fine grain, ideal for creating intricate designs
Think about the look you want when picking wood. For a rustic vibe, choose wood with a bold grain. For something modern, go for smoother wood.

Knowing the different woods and their traits is key for making unique and beautiful wall art made of wood. By picking the right wood, your decorative wood wall art will look great and last a long time.
Designing Your Wall Art Made of Wood
Creating large wood wall art starts with a clear design. You need to sketch your ideas, think about the size, and make templates for accuracy. Planning your design helps you make a piece that shows your style and fits your home.
Begin by brainstorming different ideas and themes. Think about the room and the look you want. Nature, architecture, or other art can inspire you. Then, sketch your design, keeping size and proportions in mind.

- Scale: Make sure the piece fits the room and wall.
- Balance: Create a balanced composition for a nice look.
- Color: Choose colors that match your decor.
By planning well, you can make a beautiful, unique piece for your home. Enjoy the process, be creative, and don’t hesitate to try new things.
Basic Woodworking Techniques for Wall Art
To make stunning decorative wood wall art, you must learn basic woodworking skills. These skills help you create detailed designs that show off your talent. First, learn to cut, sand, and put wood pieces together. You’ll need tools and safety gear for this.
When using power tools, safety is key to avoid injuries. Always wear gloves and safety glasses. Also, make sure your work area has good air flow. For wooden wall decor, you can pick from many types of wood, each with its own look and feel.
- Cutting: Use a saw or a cutting tool to cut wood pieces to the desired size and shape.
- Sanding: Smooth out the wood surface using sandpaper or a sanding tool to create a smooth finish.
- Assembling: Use nails, screws, or glue to assemble the wood pieces into the desired design.
By learning these techniques, you can make unique and beautiful decorative wood wall art pieces. They can add a personal touch to any room. Always follow safety rules and use top-notch materials for the best results.
Creative Patterns and Geometric Designs
Creating wall art from wood lets you try out many patterns and designs. Geometric shapes can make your art look modern and sleek. You can use shapes like triangles, circles, and squares to make your designs stand out.
For outdoor wall decor, choose materials that can handle the weather. Mixing wood and metal can make your art strong and lasting. Chevrons and herringbone patterns are great for outdoor decor.
Modern Geometric Patterns
- Chevrons: A classic geometric pattern that can add a modern touch to your wall art.
- Herringbone: A popular pattern that can create a sense of movement and energy.
- Hexagons: A unique and eye-catching pattern that can add a touch of sophistication to your wall art.

Traditional Wood Motifs
Traditional wood motifs, like wood carvings and sculptures, bring elegance to your art. Use different woods, like oak and maple, for detailed designs.
Abstract Design Concepts
Abstract designs, with shapes and colors, can make your art unique and eye-catching. Mixing wood and metal can add texture and depth to your art.
Wood Preparation and Treatment Methods
To make stunning wooden wall decor, you must prepare and treat the wood right. This means sanding, staining, and sealing. These steps make sure your large wood wall art looks great and lasts long.
Begin by sanding the wood to smooth out any rough spots. This step ensures a smooth finish and prevents splinters or cracks. Then, apply a stain or sealant to protect the wood from damage and decay. This step also highlights the wood’s natural beauty, showing off its grain and texture.
Some important wood treatment methods include:
- Applying a waterproof sealant to protect the wood from moisture and humidity
- Using a wood conditioner to prevent warping or cracking
- Adding a UV-resistant finish to prevent fading or discoloration
By following these steps and using the right treatment methods, you can make a beautiful piece of wooden wall decor. It will last for many years. Whether it’s a large wood wall art or a small decorative item, proper preparation and treatment are key for a professional finish.

Adding Color and Texture to Your Wooden Wall Decor
As you work on your wooden wall art, think about adding color and texture. This makes it unique and personal. You can use staining, painting, or natural finishes to do this. It’s key to try different colors and textures to match your style.
Some popular ways to add color and texture include:
- Staining: This involves applying a stain to the wood to enhance its natural color and texture.
- Painting: You can use paint to add a pop of color to your wooden wall decor, or to create a unique design or pattern.
- Natural wood finishes: This includes using natural oils or waxes to protect the wood and enhance its texture.
When using these methods, safety is important. You don’t want to damage the wood or hurt yourself. By using the right techniques and materials, you can make beautiful wall art.

Remember, the secret to amazing wall art is to have fun and experiment. Don’t be afraid to try new things and make mistakes. They can lead to unique and unexpected results. With patience and practice, you can make a piece that shows off your personality and style.
Mounting and Installation Tips for Large Wood Wall Art
Installing large wood wall art requires careful steps for a safe and secure setup. First, gather the right tools like nails, screws, and brackets. It’s also key to measure and level the art to avoid damage to the wall or the art itself.
To start, make a list of what you need, including:
- Wall anchors or screws
- Hanging brackets or nails
- A level and measuring tape
- A drill or screwdriver
With all materials ready, you can begin the installation. Having someone help with large and heavy pieces is wise. Always wear gloves and safety glasses to prevent accidents.
For a sturdy installation, use both nails and screws. This adds extra support and keeps the art from falling or moving. By following these steps, your large wood wall art will last for many years.
With the right tools and patience, you can make your space beautiful with wooden wall decor. These tips are useful for both DIY experts and beginners. They help you achieve a professional look that enhances your large wood wall art.
Creating Outdoor Wooden Wall Decor
Creating outdoor wooden wall decor means thinking about what the wood will face. The right design and materials are key to making your wood wall art last. Choose woods like cedar, cypress, or redwood for their natural resistance to rot and bugs.
To keep your outdoor wooden decor safe from the weather, apply a sealant or stain. This helps keep water away and protects against UV damage. You can also use outdoor paint for extra protection. Pick a finish that matches your style and needs.
- Weather-resistant wood slices or planks
- Geometric patterns or designs made from wood
- Nature-inspired wall art, such as a wooden tree or leaf design
With the right materials and design, you can make outdoor wooden wall decor that’s both beautiful and strong. Think about your outdoor area’s style and theme when picking your wood wall art. Don’t hesitate to try new designs and materials.
Maintaining and Preserving Your Wood Wall Art
To keep your wall art made of wood looking great, regular care is key. Clean it often, dust it, and protect it from damage. Use a soft cloth to wipe away dirt or debris.
For decorative wood wall art that’s more delicate, a gentle wood cleaner or polish is best. Always handle it carefully. Avoid extreme temperatures or humidity, which can harm the wood.
Here are some tips to help you maintain and preserve your wall art made of wood:
- Avoid placing the piece near direct sunlight or heat sources
- Use a humidifier to maintain a stable humidity level in the room
- Handle the piece with clean, dry hands to prevent oil or dirt from transferring to the surface
By following these tips, you can make your decorative wood wall art last longer. Always be gentle with it. And never use harsh chemicals or abrasive materials that can damage the finish or harm the wood.
Incorporating Decorative Wood Wall Art in Different Room Styles
Decorative wood wall art can add elegance and sophistication to your home. It comes in many styles and designs to match your decor. Think about the look you want in your room and how wooden wall decor can improve it.
In modern spaces, sleek designs with geometric patterns or abstract shapes work well. A simple yet elegant wood art piece can make your living room or bedroom look sophisticated. For rustic and traditional rooms, choose decor with intricate designs or a distressed finish.
Modern and Contemporary Spaces
- Choose sleek and minimalist designs that feature geometric patterns or abstract shapes
- Consider using wooden wall decor with a simple yet elegant design to add a touch of sophistication to your room
- Look for pieces that feature a combination of wood and other materials, such as metal or glass, to add depth and interest to your space
Rustic and Traditional Settings
- Opt for wooden wall decor that features more intricate and ornate designs, such as carved wooden panels or wooden wall art with a distressed finish
- Consider using decorative wood wall art that features natural materials, such as reclaimed wood or stone, to add warmth and texture to your space
- Look for pieces that feature traditional designs, such as wooden wall art with a classic or vintage feel, to complement your existing decor
Choosing the right decorative wood wall art can elevate your room’s elegance and sophistication. It creates a unique and beautiful atmosphere that shows off your personal style. Whether you like modern or traditional, there’s something for everyone.
Conclusion: Bringing Your Wooden Wall Art Vision to Life
Creating stunning wall art from wood is a rewarding hobby. You can master woodworking techniques, learn about wood types, and try different designs and finishes. This way, you can make your unique wooden wall art vision come true.
Whether you like modern designs or traditional wood motifs, let your creativity shine. Don’t be afraid to try new things. Each piece of wood art will be unique. And for outdoor decor, you can make designs that last and look great.
Keep having fun as you make your wooden wall art. With the right tools and a bit of practice, you’ll create something beautiful. It will add warmth and character to your home. So, let your creativity flow and start making your wooden wall art vision today!